Maytag 5000 Dryer Repair

DISCLAIMER: I am not a repair professional, just a slightly handy homeowner.
We have a Maytag 5000 series washer and dryer in our house that were left by the previous owners. DO NOT ever buy these pieces of junk. I am done with Maytag and won't ever buy another set from them…but I digress. Pretty much all washers and dryers use the same interchangeable parts, so I'm not sure there is much difference between the major brands.
They are what we have and I want to keep them running as long as possible. Too bad our dryer decided to turn into a banshee overnight and make a horrible squealing noise. The problem started a month or so ago with intermittent squealing that would stop after a while, but whatever was happening finally went all bad and now the sound was consistent. Some quick Googling and common sense for that sound from a dryer points to just a few potential causes.
- Worn out rollers
- Worn our tensioner pulley
- Worn out motor
Armed with a Philips screw driver and an assortment of hex screw bits, I took to work, taking apart the dryer to find the culprit.
My Process
Narrow Down the Location
With the dryer running I moved around the dryer trying to ascertain the general location of the sound (top/bottom, left/right, front/back). From this, all I could really figure out is that it was on one side of the dryer.
Take It Apart
UNPLUG THE DRYER from the wall before doing any further work
Position the dryer in such a way that you have an easy path to the front and back and have enough room to lay down comfortably, otherwise you are in for a not good time.
Get plastic baggies or a few pieces of paper so that you can label and set aside the screws as you take them out.
Wear gloves, there are lots of sharp metal edges throughout the dryer.
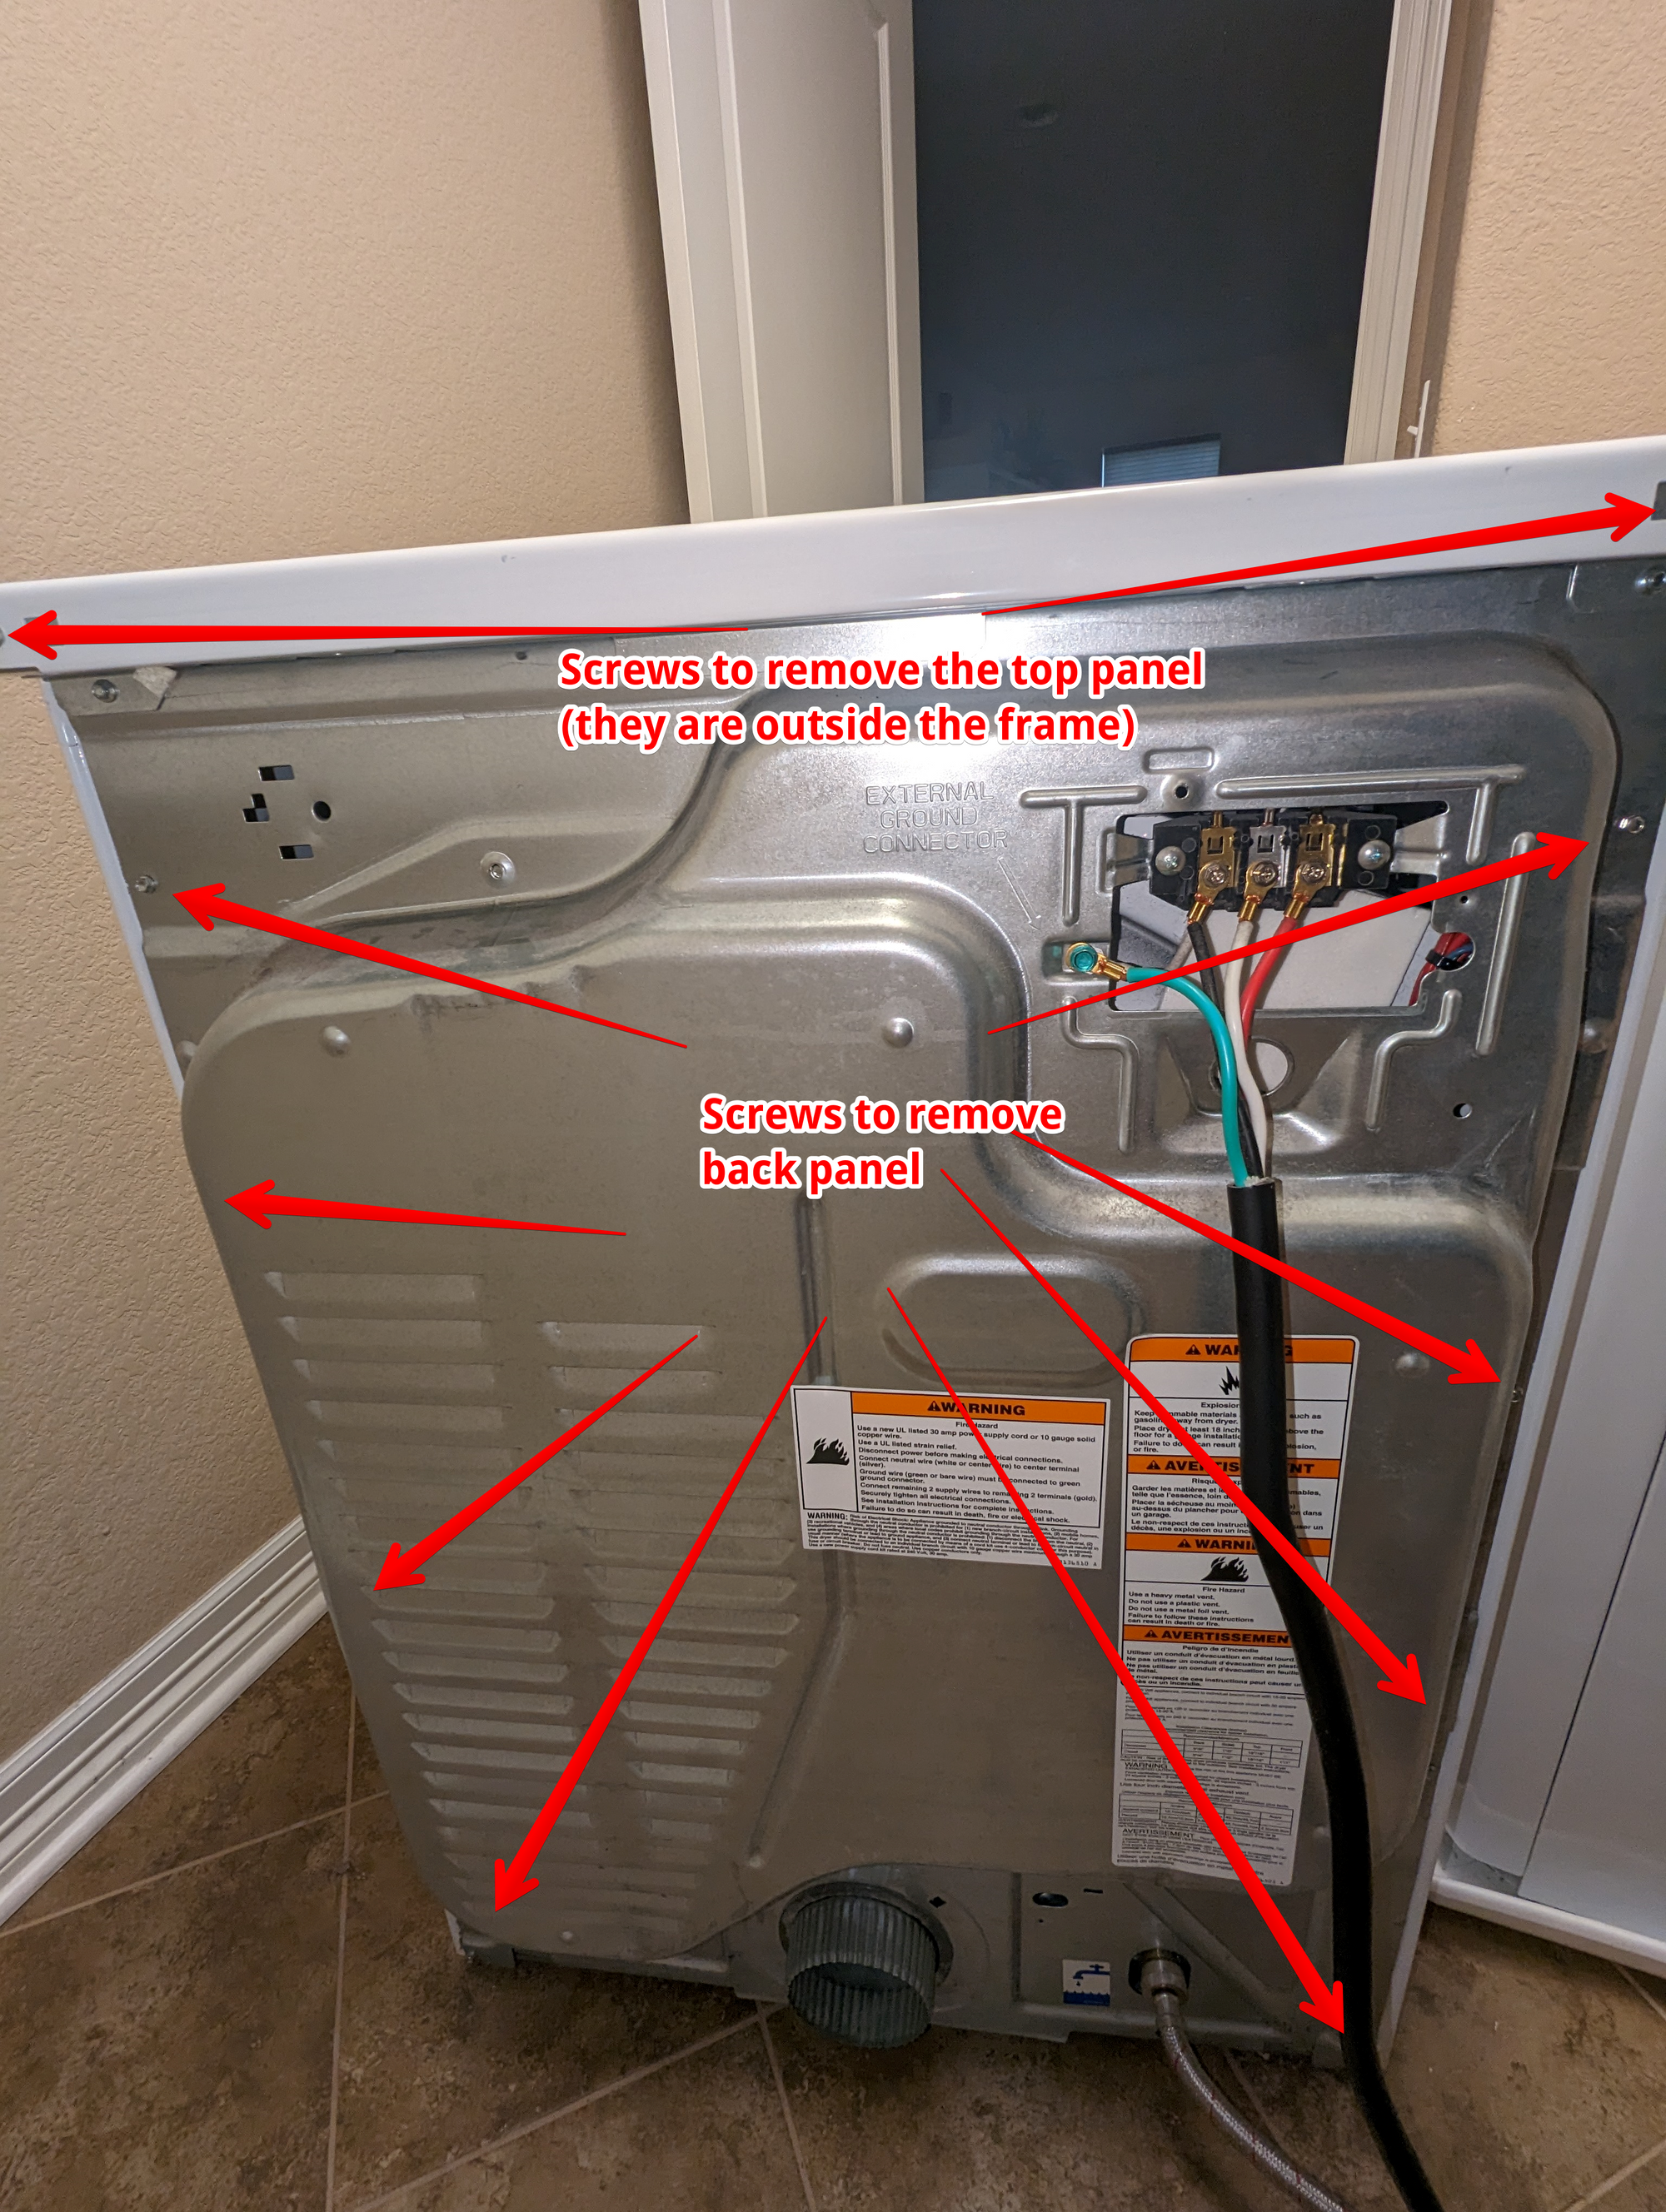
Top Panel
This dyer is exceedingly annoying to get access to any components. You cannot take off the front or back panel on their own. So first, the top panel has to come off with a couple screws at the top rear of the dryer. The top panel then slides towards the rear slightly and can be listed out of place.
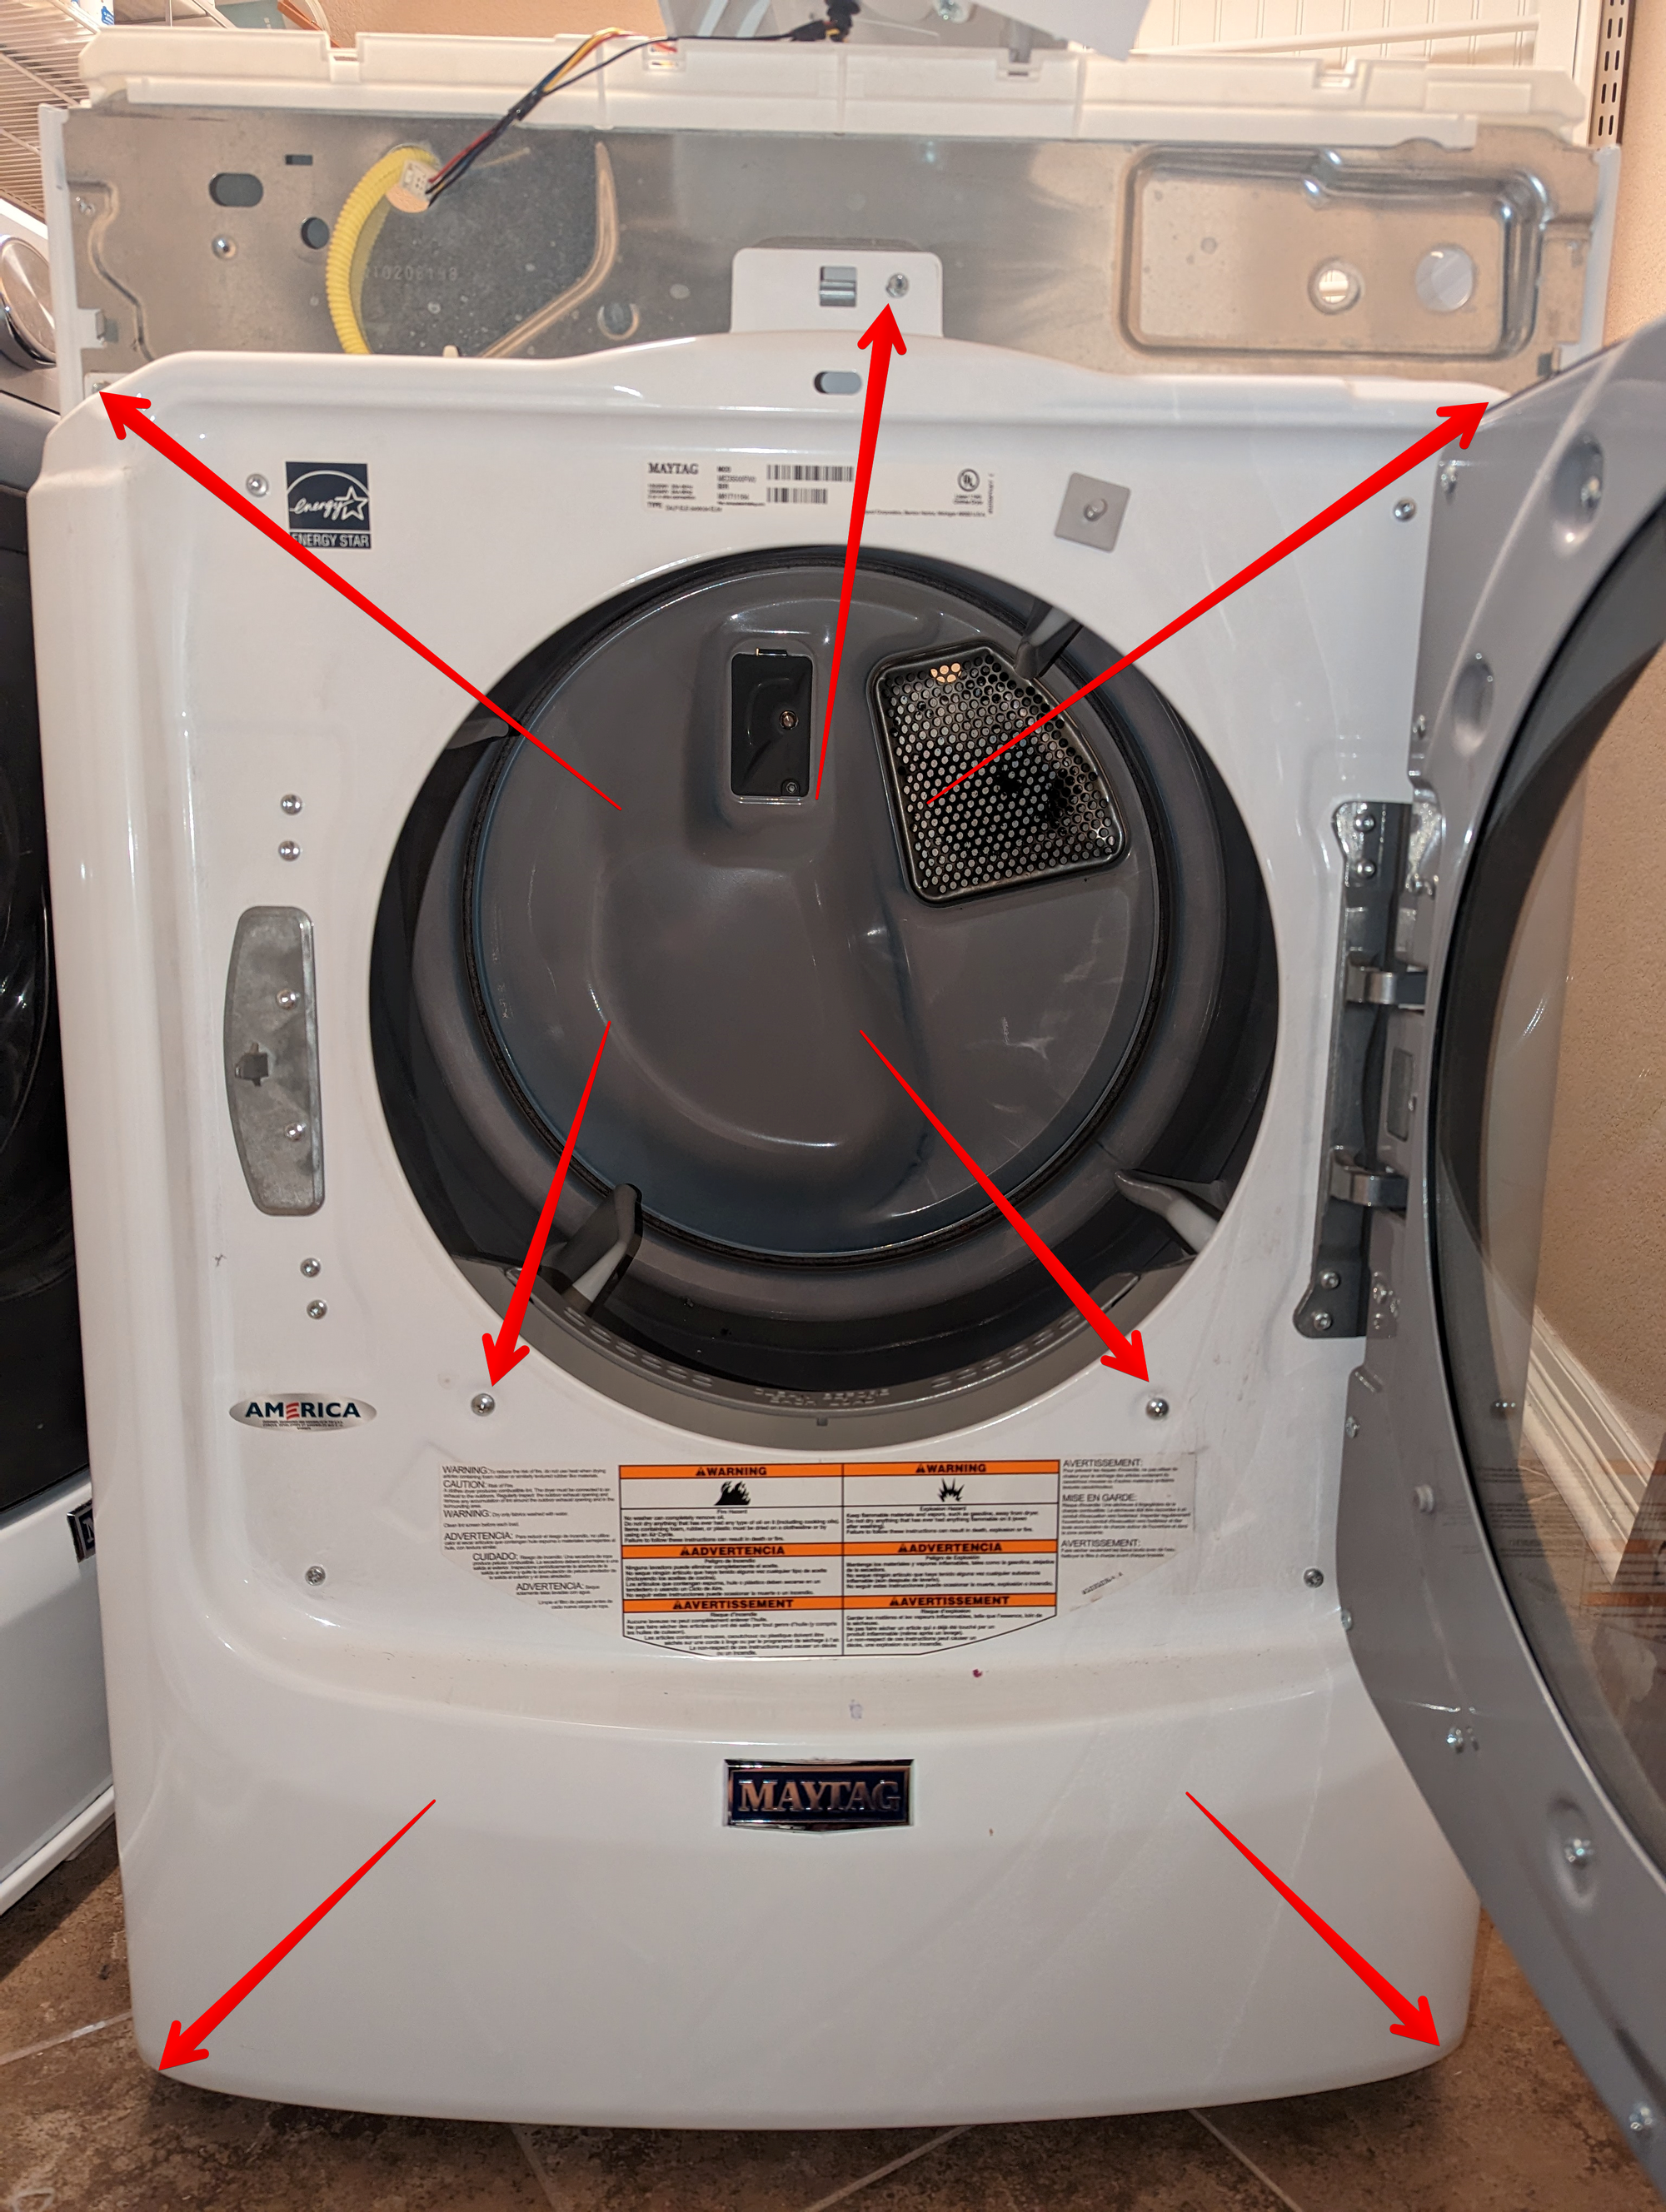
Front Panel
Because the sound sounded slightly like it was coming from the front of the machine, the front panel was next. First you have to remove the control panel with a couple screws on the top of the plastic bracket. Then with a little bit of force, you can unseat the control assembly. I usually end up having to disconnect at least one of the cables so that the control panel can rest nicely on top of the unit.

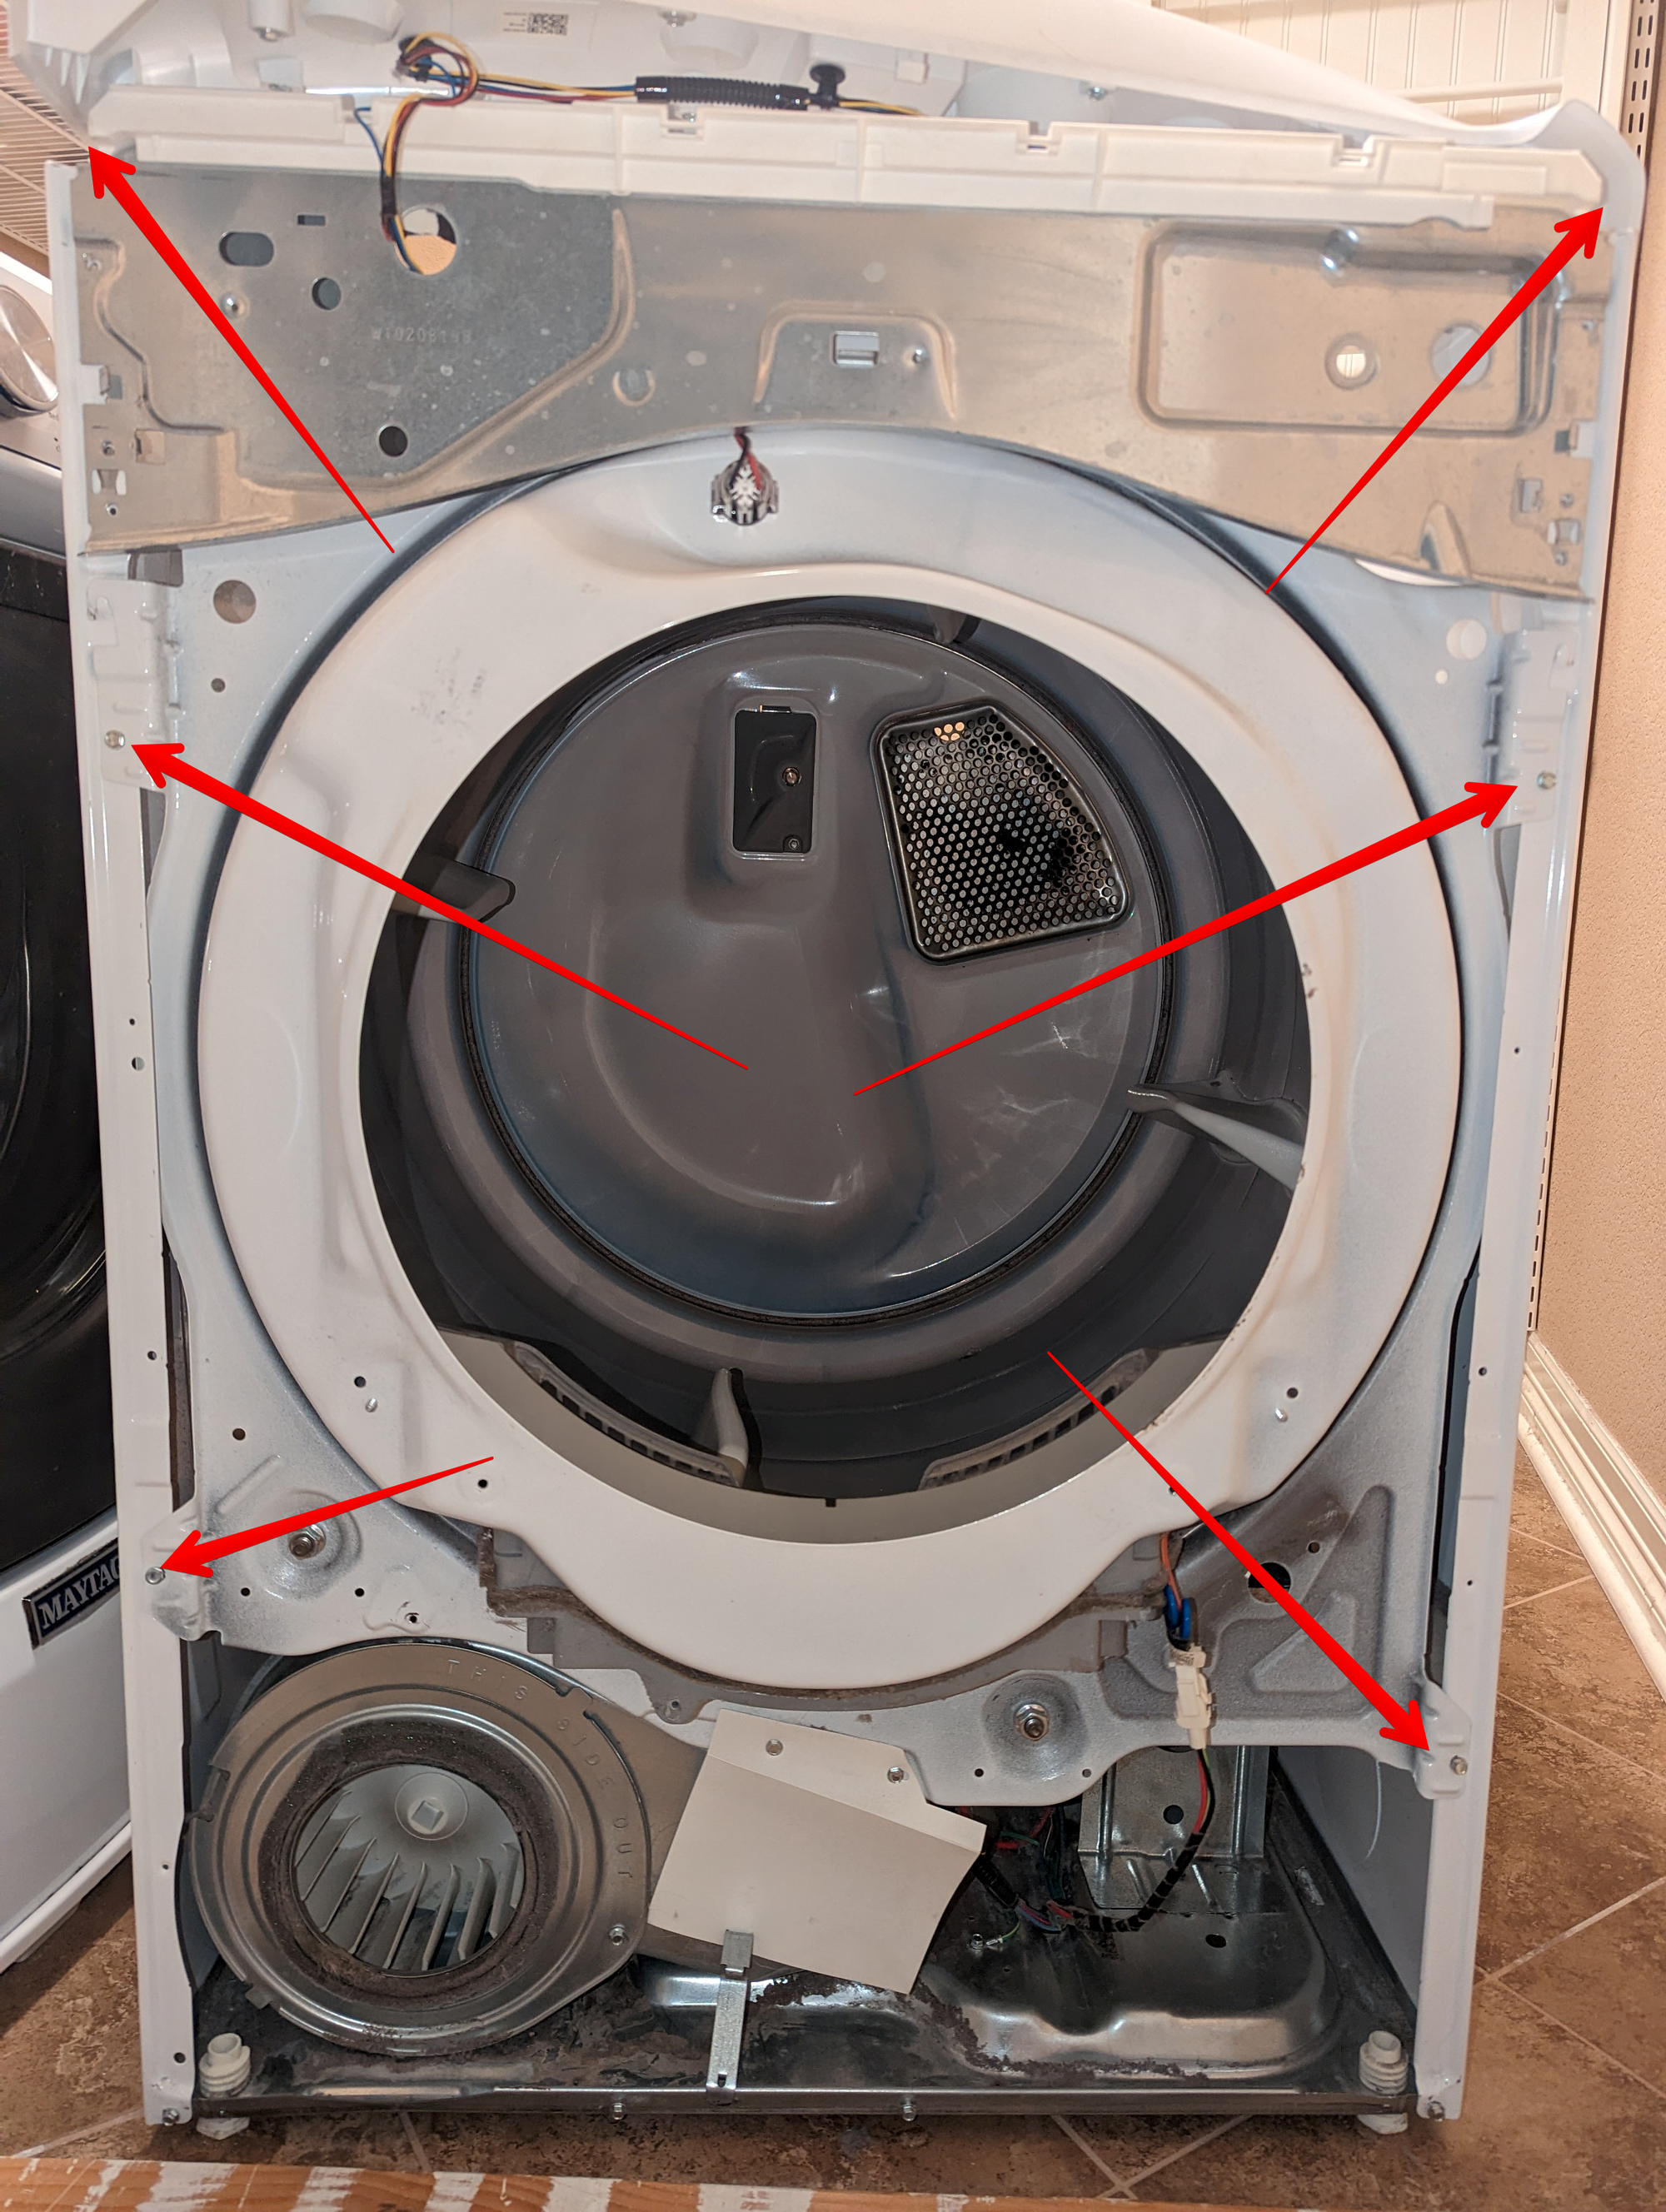
With the control panel removed, you can now access all the necessary screws to remove the entire front panel. There are a few along the top, one at each bottom corner, and then two Phillips screws behind the low part of where the door closes. Be careful, this panel with the door is heavy and will fall over on you if you are not careful. Disconnect the necessary cables and set aside.
There is not much you can see or do at this point. You could take the lint duct off here to get access to both front rollers if you want to start there. I recommend moving onto the back panel. With both the front and back panels off, you will have a lot of light and space to work with.
Back Panel
First, remove the lint hose. The back panel screws are all around the perimeter of the panel except for three on top of the back panel that will also allow the bracket holding the circuit board to sag. Remove these screws. I typically leave the power chord and water hose connected and just slide the panel along those far enough to be out of the way. If you want those, you can turn off the water to the hose and remove both that and the power cable to make things a bit easier.
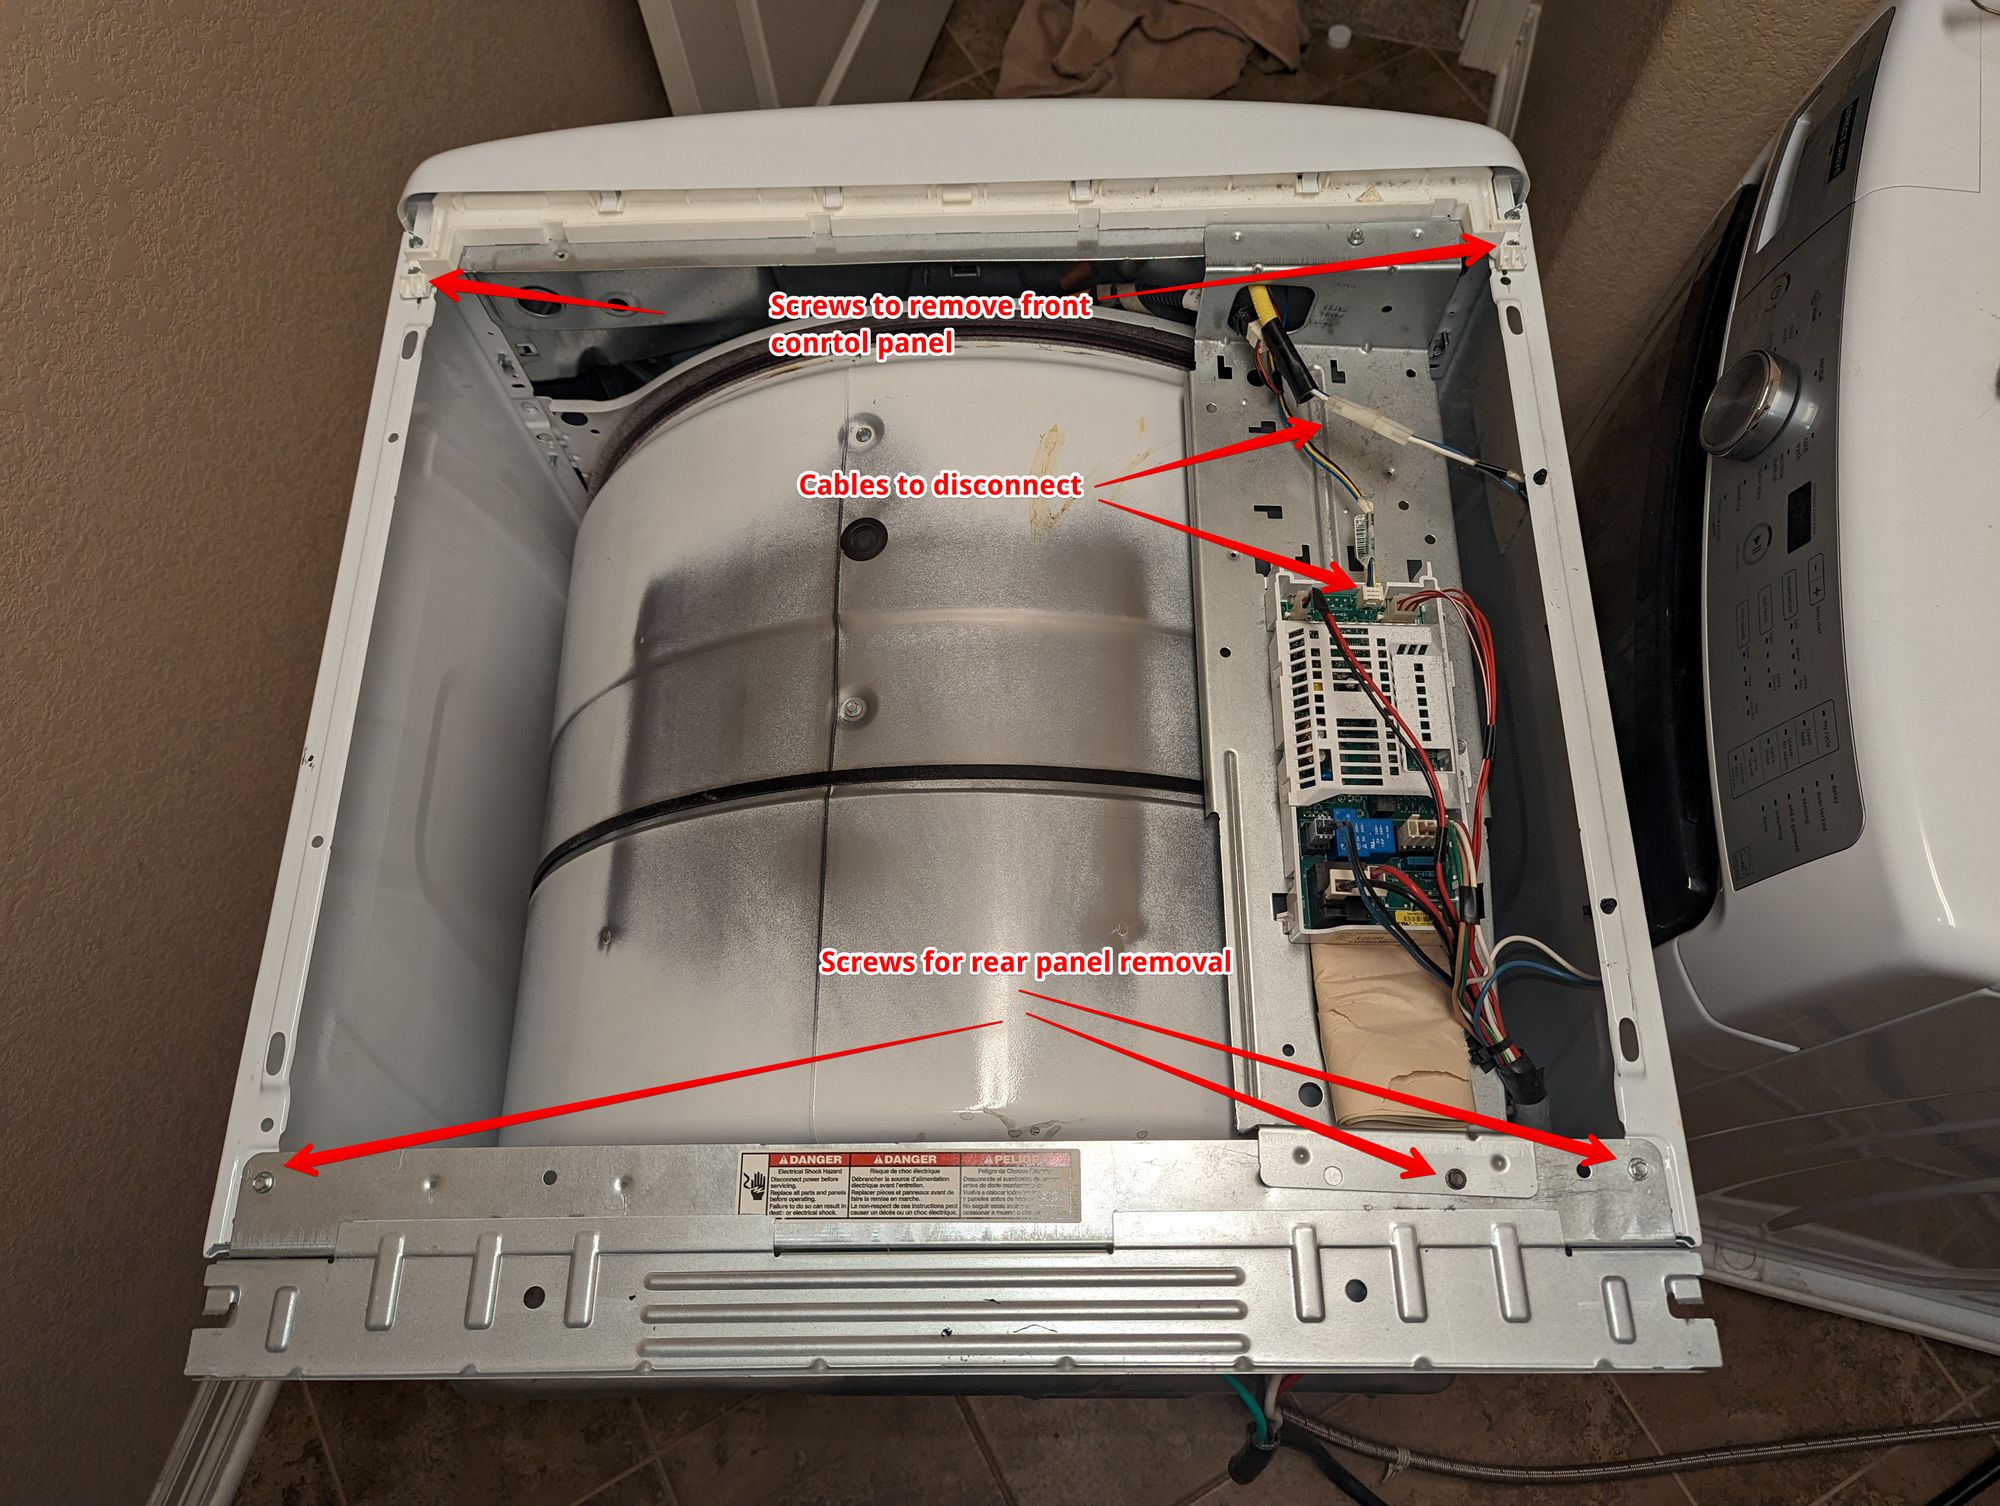

Investigate
With the top, front, and back panels off, you should be able to see/access almost all the components that could be causing the issue. With the help of someone else and while keeping all extremities away from the drum, have them rotate the drum and see if you can further narrow down where the sound is coming from. The sagging circuit board bracket from the previous step will make some noise, so hold that out of the way.
There are 4 rollers, 2 front and 2 rear, at the bottom of the drum that could be the problem. Listen to those. The next item is the tensioner pulley. It is a small wheel right next to the drive motor pulley. If you want you can take off the belt (not the routing) and spin that pulley on its own to see if it moves freely or makes any noise. In my case, this revealed my issue because I could hear a quieter version of the sound when hand-turning the pulley. The last item is to spin the motor freely and check for odd noises.
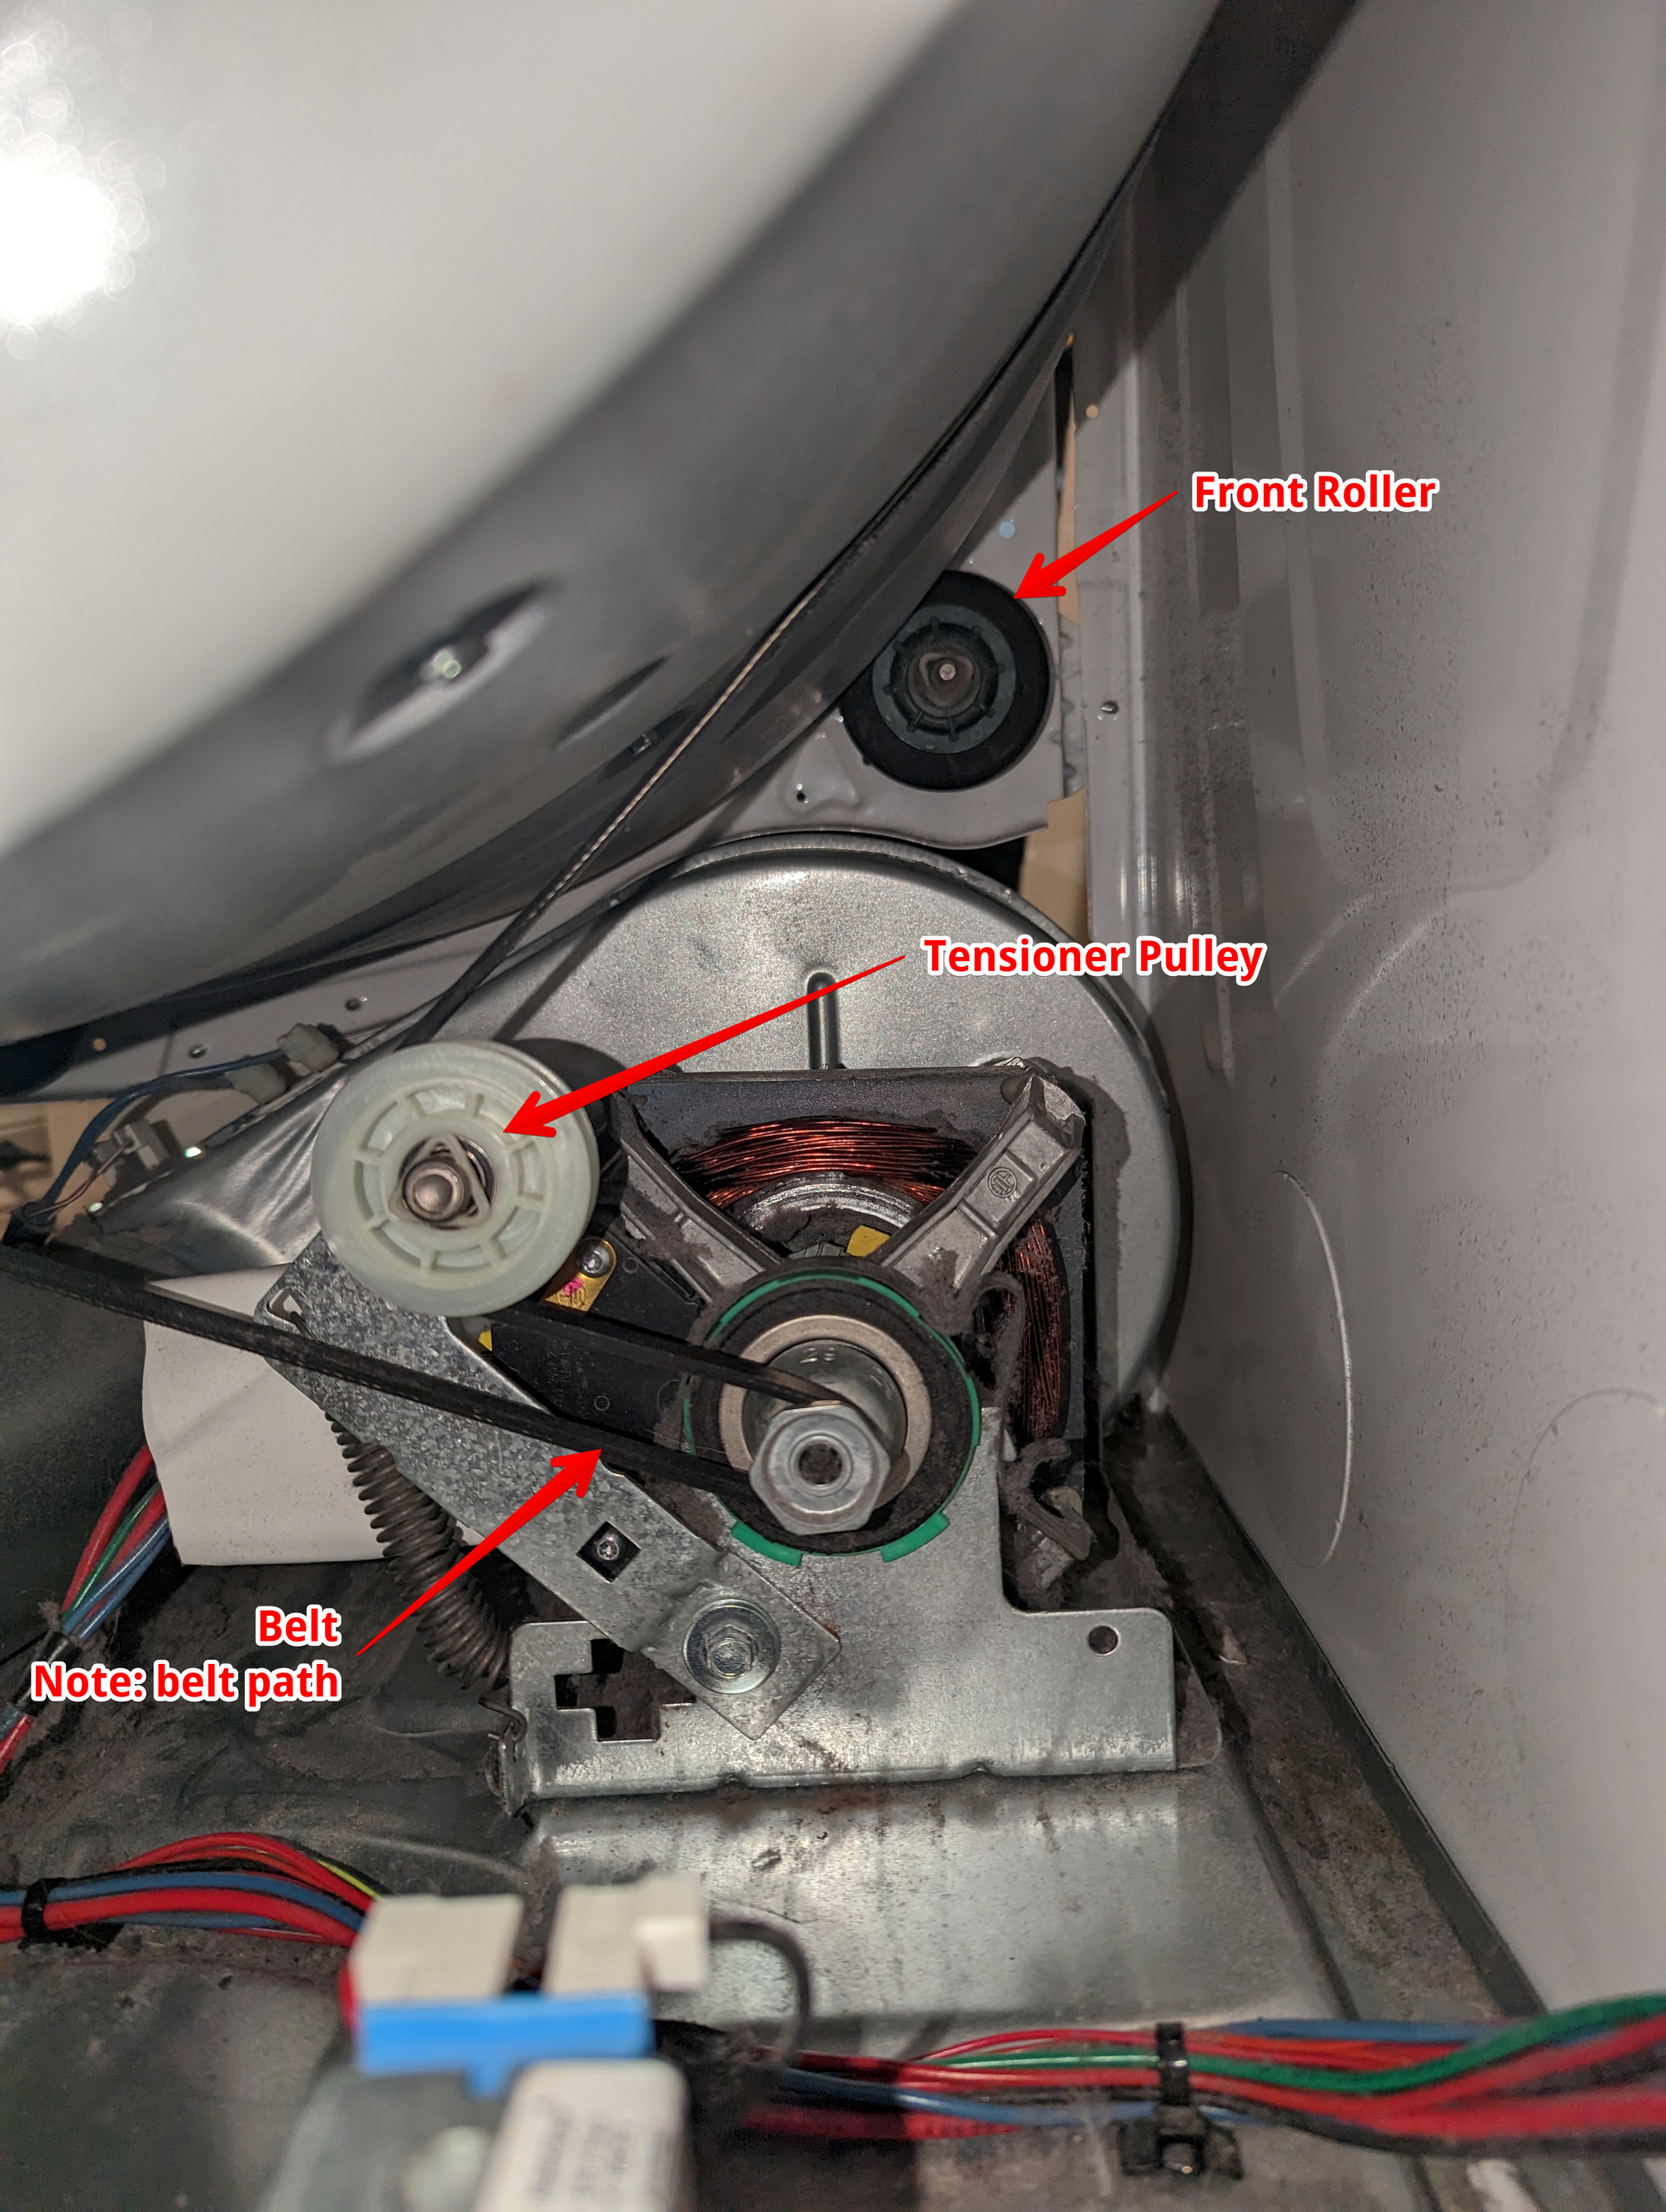
With the culprit discovered (tensioner pulley) it was off to Amazon for parts. This $18 kit was exactly what I needed. Since this kit comes with the rollers and pulley, it would make sense to replace all those parts along with the belt while the dryer is all apart.
Replace
Getting the rollers and pulleys off are fairly simple. They each have a plastic triangle fastener that holds them in place. Use a flathead screwdriver to pop these off. For the tensioner pulley, this is the only necessary step and you can pull the pulley out. Put the new pullet back on and install the new retaining bracket. Re-route the belt and you are done with this part. Optionally, install the new belt that came with your kit. You should be able to work it around the drum without too much fuss.
The rear rollers require you to remove more screws that hold the rear support bracket to the side walls. I recommend you do the rears and then put them and the rear support bracket back in place before moving to the front. The rear rollers are in a bit of an awkward spot that can make it difficult to get to the triangle retaining brackets. Once you do get them off, you will have to kind of pull at the rear support bracket (that you just took the screws out of) to provide enough clearance to get the rollers off.

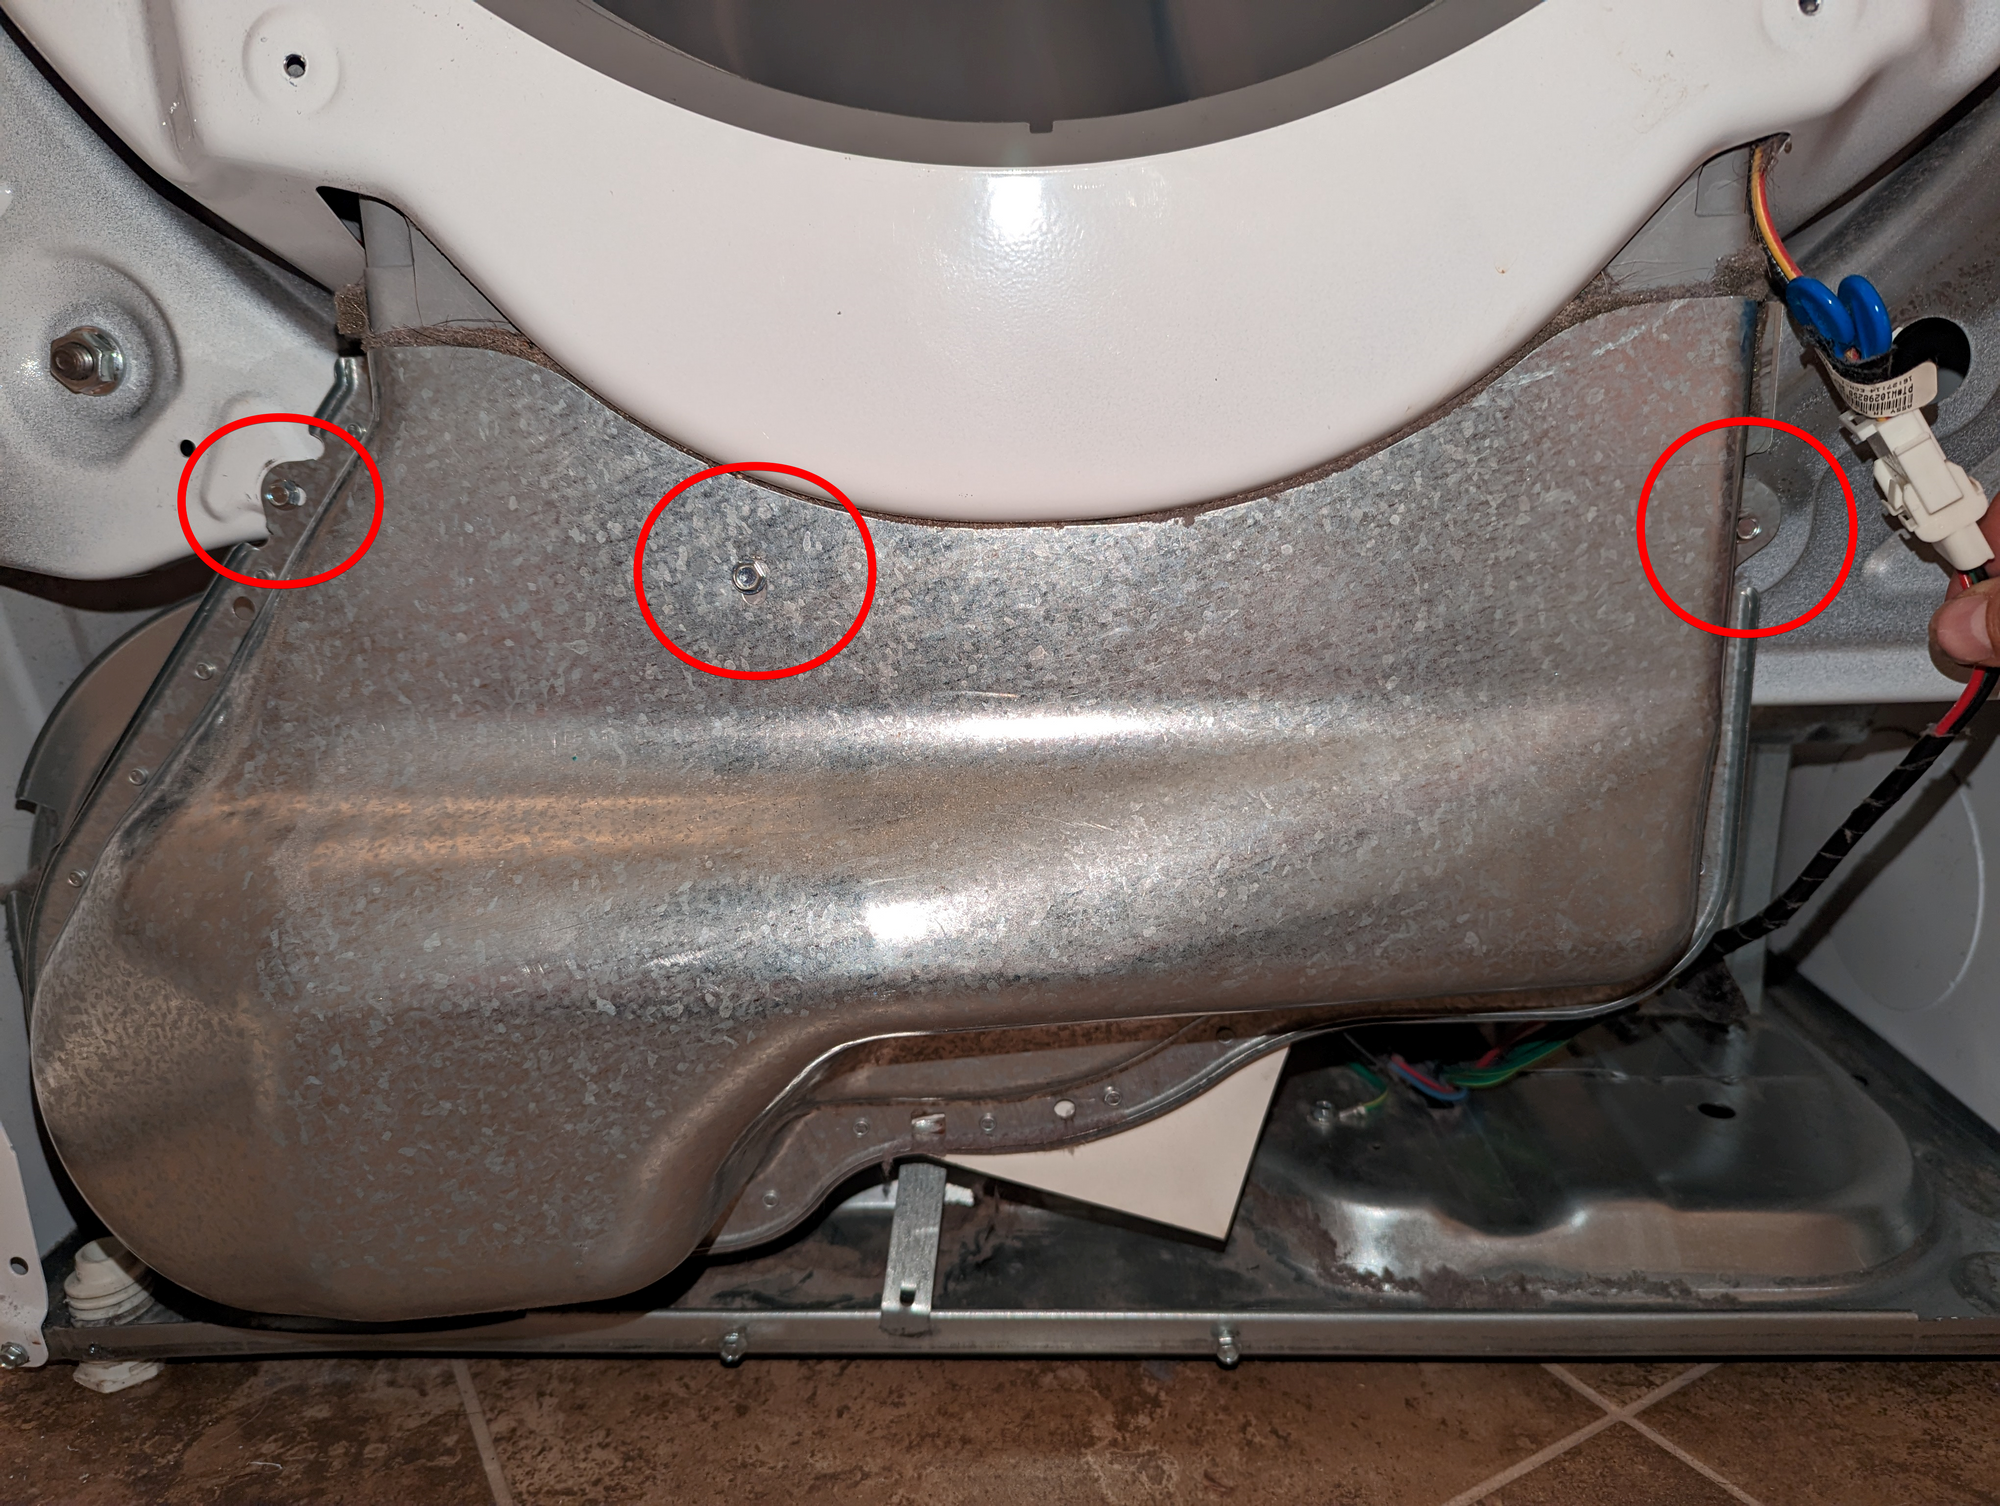
The process for the front rollers is essentially the same as for the rears. Again, it is probably best to finish the rear and reinstall the rear support bracket before moving to the front. To access one of the front rollers you will need to remove the lint duct. Remove the lint trap first. Then there are 3 screws around the enclosure that will need to be removed. With the screws out, gently move the enclosure around until it comes loose and set aside. To actually get the rollers off, you will have to again remove some screws from the front support bracket. The lower two screws and top left screw will be necessary to get the appropriate clearance. With access to both front rollers, repeat the steps from the rear rollers to install the new ones. Reinstall the support bracket screws before moving on.
Quick Test
Again, with a helper, rotate the drum manually to ensure there are no new noises and that the original noise is now gone.
Also, before everything goes back together, if you have not already, this is a great opportunity to grab a vacuum and clean out the inside of the dryer.
Button It All Back Up
Put everything back together in reverse order
1. Lint duct
2. Front panel (including control board)
3. Rear panel
4. Top panel
5. Lint hose
Turn the dryer on and witness your handiwork in use!